Lime Button#

Button with Double Border#
Standard image made using the common class.
Show/Hide Code 10button.py
'''
lime scrollbar and active unchecked checkbox
- used as template for other button widgets

Create selected state, based on normal state
'''
from roundrect import Gr_Bi_Base_Rect

exp = 9 # enlargement, also thickness between rectangles
w=27 # enlarged from 25
h=27
radius = 6 # gap size was 5
tab = 0
first = '#A3CCC4'
second = '#5D9B90'
third = 'white'
startc = (222,247,222)
stopc = (143,188,143)
fout = '../images/lime/button-sa.png'

Gr_Bi_Base_Rect(fout,w,h,exp,radius,first,second,third,startc,stopc,tab)
Normal |
Pressed |
Active |
Disabled |
|
|
|
|
There are quite a few button variations to pick from, to start with use the standard widget from the common code.
If we now look at the alternative button the border has a gradient that changes from near white at the upper part. Inside the widget a second gradient runs from top to the bottom border. This is based on ideas from the keramik button.
The border was initially quite dark and surrounded a fairly light gradient,
created by an import from tools. A second image was created with just a
slightly darker gradient. The two images were coalesced using PIL ImageChops
lighter. The goal was to replace the border with a gradient, but
retain the internal gradient. Afterwards resize then create the extra states.
Set the border dimensions such that when the button is expanded vertically
only a narrow band is utilised, horizontally make allowance for the corners.
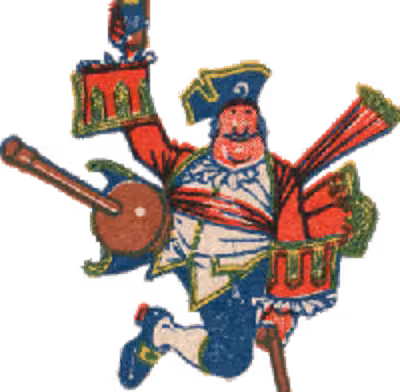
In order to enable the pressed state it had to be placed just after the normal state, with the active state next. The appearance had horizontal stripes due to the gradient, which was cured by an aggressive use of the border dimensions just as we had done in the pirate theme. The text foreground was changed to dark red to give contrast to the background.
Show/Hide Code 10buttonalternative.py
'''
button alternative

based on keramik button
open at top, border has gradient
make certain inner and outer gradients contrast
use ImageChops.lighter to combine gradients, then
can resize giving good antialias, so require function
gr_base

'''
from PIL import Image, ImageDraw, ImageChops
#from roundrect import Gr_Base_Rect
from tools import LerpColour, gr_base, trans

exp = 9 # enlargement, also thickness between rectangles
w=25
h=25
we = w*exp
he = h*exp
radius = 5 # gap size
re=radius*exp
steps = he

second = 'white' #(102,153,204)back
first = '#2B2B2B' #'#5D9B90' # (222,247,222)border
startci = (236,247,222) # (227,247,227) (143,188,143) (26,242,195)
stopci = (148,229,50) #(143,188,143) (222,247,222) (225,242,238)
startc = (240,252,240)
stopc = (87,137,87) #(222,247,222) (210,242,234)

img = gr_base(we,he,exp,re,first,second,startci,stopci)
#img.save('../images/lime/ibutton-n.png')

grad = Image.new('RGBA', (we,he), 'white')
igrad = ImageDraw.Draw(grad)


# gradient
for j in range(steps):
    cr,cg,cb = LerpColour(startc,stopc,j/(steps-1))
    igrad.line([0,j,we-1,j],fill=(cr,cg,cb))

#grad.save('../images/lime/grad.png')

limg = ImageChops.lighter(grad,img)
limg = limg.resize((w,h),Image.LANCZOS)
trans(limg,w,h,radius)
limg.save('../images/lime/button-n.png')

pimg = limg.rotate(180)
pimg.save('../images/lime/button-p.png')

aimg = limg.point(lambda p: int(p * 1.1))
aimg.save('../images/lime/button-a.png')

dimg = limg.convert('L')
dimg = dimg.convert('RGBA')
trans(dimg,w,h,radius)
dimg.save('../images/lime/button-d.png')
Show/Hide Code 10lime_button.py
'''
Button

All button apart from button-sa
required padding 4 to compress the buttons
'''

from tkinter import Tk, PhotoImage
from tkinter.ttk import Style, Frame, Button
from RunState import run_state

root = Tk()

fr = Frame(root)
fr.grid(column=0,row=0,sticky='nsew')

img1 = PhotoImage("button-n", file='../images/lime/button-n.png')
img2 = PhotoImage("button-d", file='../images/lime/button-d.png')
img3 = PhotoImage("button-p", file='../images/lime/button-p.png')
img4 = PhotoImage("button-sa", file='../images/lime/button-sa.png')
img5 = PhotoImage("button-a", file='../images/lime/button-a.png')


style = Style()
# both theme_create and theme_settings worked
style.theme_create( "yummy", parent="clam", settings={
#style.theme_settings('default', {
# start of theme extract
     'TButton': {
         'configure': { "anchor": "center",'padding': [10,0], 'foreground': '#8b0a50'}, # "width": 10,,
         'layout': [
         ('Button.focus', {'children':
            [('Button.button', {'children':
                [('Button.padding', {'children':
                    [('Button.label', {"side": "left",'expand': 1})]
                })]
            })]
        })]},

     'Button.button': {"element create":
          ('image', "button-n",
           ('pressed', "button-p"),
           ('active', "button-a"),
           ('selected', "button-sa"),
           ('disabled', "button-d"),
           {'border':[5,12,5,12], 'padding': 4,  'sticky': "nsew"}) # "nsew"
         }

# end of theme extract - don't forget to add comma at end when inserting
     })

style.theme_use ('yummy') #('yummy') #'default'
widg = Button(fr,text='Piratz!')
widg.grid(column=0,row=18, padx=5, pady=5) #sticky='nsew',
widg1 = Button(fr,text='Piratz!\nextra line made longer')
# sticky='nsew', makes no difference
widg1.grid(column=0,row=19, padx=5, pady=5) # sticky='nsew',
run_state(fr,widg,widg1)

root.mainloop()
Show/Hide Code 10lime_button_alt.py
'''
Button

required padding 4 to compress the buttons
'''

from tkinter import Tk, PhotoImage
from tkinter.ttk import Style, Frame, Button
from RunState import run_state

root = Tk()

fr = Frame(root)
fr.grid(column=0,row=0,sticky='nsew')

img1 = PhotoImage("button-n", file='../images/lime/button-n.png')
img2 = PhotoImage("button-d", file='../images/lime/button-d.png')
img3 = PhotoImage("button-p", file='../images/lime/button-p.png')
img4 = PhotoImage("button-sa", file='../images/lime/button-sa.png')
img5 = PhotoImage("button-a", file='../images/lime/button-a.png')


style = Style()
# both theme_create and theme_settings worked
#style.theme_create( "yummy", parent="clam", settings={
style.theme_settings('default', {
# start of theme extract
     'TButton': {
         'configure': { "anchor": "center",'padding': [10,0], 'foreground': '#8b0a50'}, # "width": 10,,
         'layout': [
         ('Button.focus', {'children':
            [('Button.button', {'children':
                [('Button.padding', {'children':
                    [('Button.label', {"side": "left",'expand': 1})]
                })]
            })]
        })]},

     'Button.button': {"element create":
          ('image', "button-n",
           ('pressed', "button-p"),
           ('active', "button-a"),
           ('selected', "button-sa"),
           ('disabled', "button-d"),
           {'border':[5,12,5,12], 'padding': 4,  'sticky': "nsew"}) # "nsew"
         }

# end of theme extract - don't forget to add comma at end when inserting
     })

style.theme_use ('default') #('yummy') #
widg = Button(fr,text='Piratz!')
widg.grid(column=0,row=18, padx=5, pady=5) #sticky='nsew',
widg1 = Button(fr,text='Piratz!\nextra line made longer')
# sticky='nsew', makes no difference
widg1.grid(column=0,row=19, padx=5, pady=5) # sticky='nsew',
run_state(fr,widg,widg1)

root.mainloop()