Colour Schemes and Gradients#
Colour Schemes#
Having sorted out the widget outline it is important to fix its colouration and maybe a colour gradient. Remember colours created through antialiasing obviously affect the appearance but mostly are derived implicitly.
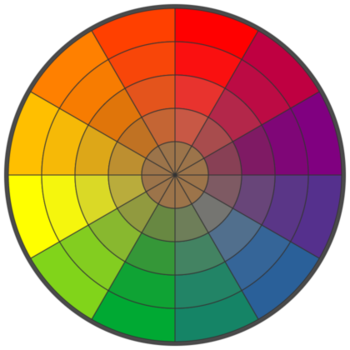
Red Yellow Blue colour wheel#
At the centre of the wheel, where all three colours come together, the resulting colour is a muddy brown. (If in doubt try it with coloured pencils).
The following guidelines are to be taken as a starting point only, since they are based on internal decorating practice which uses the RYB colour wheel, so take with a pinch of salt. When printing the CMYK colour wheel is truer.
- One Hue:
Stick to one hue adjusting the saturation and value - which lends itself to the hsv colour space. Neutral colours probably work best, which means almost anything that is not bright red, orange or yellow.
Gradients should be straightforward.
- Side by Side:
two adjacent colours.
- Opposites:
two complimentary colours, which are exactly opposite in the normal colour wheel, vibrant colours are produced especially if both have a large saturation.
They will automatically give a warm and a cool colour.
Gradients will be tricky when both colours are used as the end colours. Intermediate colours may need to be defined to avoid bad looking gradients. If you should use the HSV colour scheme it will produce the perimeter rgb colours which will look like a rainbow - not too clever.
- Three Together:
three colours - choosing adjacent colours should look harmonious, it works best if one colour dominates.
- Spaced Three:
three colours - evenly spaced around the normal wheel. As with complimentary colours gradients may not be so straightforward.
- Opposite Three:
three colours - choose one colour then select the adjacent colours to the complimentary colour. This should produce a toned down complimentary colour scheme. Still be careful of gradients.

RGB and HSV Colour Wheel#
This colour wheel comes from paint.net. Notice how the selection on the perimeter of the rgb wheel shows up on the individual components.

RGB and HSL Colour Selector#
This colour selector comes from tkinter on Windows. HSL has similar properties to HSV except that the number range changes.

RGB and LCH Colour Selector#
The colour selector in GIMP uses either Lab or HSV, this version of Lab produces Lightness, Chroma and Hue. Lightness is adjusted for the various hues so can be used where we wish to change the hues but keep absolute lightness constant.
Note
The HSV colour space is related to the RGB colour space in that the HSV hues are the same as the rgb perimeter colours, giving 360 HSV hues. The RGB perimiter colours produce HSV colours with 100 in both saturation and value components.
Hue |
RGB |
HSV |
HSL |
LCH |
|---|---|---|---|---|
red |
(255,0, 0) |
(0,100,100) |
(0, 240,120) |
(54.3, 106.8, 40.9) |
yellow |
(255,255,0) |
(60,100,100) |
(40, 240,120) |
(97.6, 94.7, 99.6) |
green |
(0, 255,0) |
(120,100,100) |
(80, 240,120) |
(87.8, 113.3, 134.4) |
blue |
(0, 0, 255) |
(240,100,100) |
(160,240,120) |
(29.6, 131.2, 301.4) |
black |
(0, 0, 0) |
(0, 0, 0) |
(160,0, 0) |
(0, 0, 0) |
white |
(255,255,255) |
(0,0,100) |
(160,0, 240) |
(100, 0, 141.2) |
Gradients#

Overcomplicated Gradients#
Both gradients started and finished at the same colours (134, 255, 0) (255, 0, 117). The upper gradient was made in RGB and created a greyish centre, the lower made in HSV together with a smoothing function, neither should be used.
When selecting a colour scheme the normal colour wheel helps but remember gradients will be created in RGB, so some adjustment may be required.
White, black and grey can be used as end colours in any option to produce gradients. As already stated, if grey is produced as an intermediate colour then the colour gradient normally needs adjustment.
Simple Gradient using Line#
You should be able to detect the use of gradients in some of the widgets. Since we are dealing with small images we should be able to make gradients by drawing lines that change colour using simple linear interpolation. The colour is simply RGB, rather than HSV, HSL or CIELAB.
We have a starting and a finishing colour separated into their rgb components.
Show/Hide Code gradient snippet
r,g,b = start_colour
dr = float(stop_colour[0] - r)/steps
# change of r component
dg = float(stop_colour[1] - g)/steps
# likewise g
db = float(stop_colour[2] - b)/steps
# and b

for i in range(steps):
   r,g,b = r+dr, g+dg, b+db # first colour in gradient
   idraw.line([x0, y0+i, x0+wi, y0+i], fill=(int(r),int(g),int(b)))
The above snippet of code might be used on images larger than our widgets, if used as it stands the first colour will be slightly different to our starting colour. After the start colour is corrected the finishing colour will then need to be corrected. At our image sizes this small error can be quite noticeable.
Show/Hide Code corrected gradient snippet
r,g,b = start_colour
dr = float(stop_colour[0] - r)/(steps-1)
# slightly increase the change to r
dg = float(stop_colour[1] - g)/(steps-1)
# likewise g
db = float(stop_colour[2] - b)/(steps-1)
# and b
r,g,b = r-dr, g-dg, b-db
# correction for first colour in gradient

for i in range(steps):
   r,g,b = r+dr, g+dg, b+db
   idraw.line([x0, y0+i, x0+wi, y0+i], fill=(int(r),int(g),int(b)))
The starting colour has been changed so that the first line depicts the right colour, so now we need to adjust the last line to be on the finishing colour, (slightly enlarging the differences in the rgb components).
We can replace the above with an assisting function that produces the required linear interpolation.:
def LerpColourRGB(c1,c2,t): # suitable for RGB
   return (int(c1[0]+(c2[0]-c1[0])*t),int(c1[1]+(c2[1]-c1[1])*t),
      int(c1[2]+(c2[2]-c1[2])*t))
The function treats the rgb components separately and ensures that the result is an integer. The line gradient now becomes:
for i in range(steps):
   idraw.line([x0, y0+i, x0+wi, y0+i],
      fill=LerpColour(start_colour,stop_colour,i/(steps-1))
All the component differences are being handled in the one function also the start and end colour are true without any adjustment - much simpler.
Simple Gradients using 2D Figures#
Rectangle |
|
Rectangle |
|
Ellipse |
|
Ellipse |
|
Circle |
|
Circle |
|
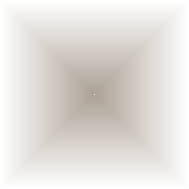

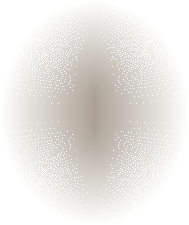
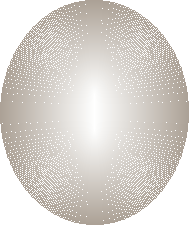

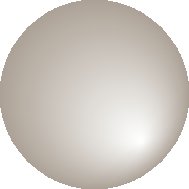
Using the same principal of linear interpolation we can create a more three dimensional look by using a rectangle, an ellipse or a circle instead of a line, remembering to make allowance for the fact that the figure has width as well as height. Starting with the largest figure, nest slightly smaller figures inside. At each successive figure change the colour, use only fill not outline - otherwise small areas will be left unchanged.
The rectangle is the easiest one to use as we are normally creating a gradient over a rectangular area. Circles and ellipses have to be made larger so that the corners of the gradient area touch the inside of the ellipse/circle.
The circle can be drawn off centre allowing us to create a more interesting highlight. Test for yourself by commenting and uncommenting the appropriate figure, also see what happens when the colours start_colour and stop_colour are swopped.
Show/Hide Code 08test_gradients.py
'''
Testing linear gradient with rectangle, ellipse and circle

for balanced ellipse width and height need to be odd
use fill for circle as this reduces number of uncoloured pixels
'''
from PIL import Image, ImageDraw
from math import sqrt

def LerpColour(c1,c2,t):
    return (int(c1[0]+(c2[0]-c1[0])*t),int(c1[1]+(c2[1]-c1[1])*t),
            int(c1[2]+(c2[2]-c1[2])*t))
    #return (int(y) for y in c1 +(c2 - c1)*t)

def circle(draw, center, radius, fill):
    draw.ellipse((center[0] - radius, center[1] - radius,
                center[0] + radius - 1, center[1] + radius - 1),
               fill=fill)

w=21 # width
h=21 # height
e=9  # enlargement
we = w*e
he = h*e
from_colour = (172,161,150)
to_colour = (255,255,255)

img = Image.new(mode='RGB', size=(we,he), color='white')
idraw = ImageDraw.Draw(img)

ul = 0,0
lr = we-1,he-1
steps = (lr[0] if he>we else lr[1])
steps = steps//2+1
# needed to ensure centre is covered
rsq = we*we+he*he

midX = we//2+1
midY = he//2+1
radius = steps #int(sqrt(rsq))

for i in range(steps):
    idraw.rectangle([ul[0]+i, ul[1]+i,lr[0]-i,lr[1]-i],outline=LerpColour(
        to_colour,from_colour,i/(steps-1)))
'''
for i in range(steps):
    idraw.ellipse([ul[0]+i, ul[1]+i,lr[0]-i,lr[1]-i],outline=LerpColour(
        from_colour,to_colour,i/(steps-1)))

# make highlight more eccentric as divisor is reduced from 9 to 2
for i in range(radius):
    circle(idraw,[midX+i//2,midY+i//2],radius-i,fill=LerpColour(
        from_colour,to_colour,i/(radius-1)))
'''
#img = img.resize((w,h),Image.LANCZOS)
#img.show()
img.save('test_rect2.png')
Radial Gradient#
Use points to make a radial gradient, creating a similar effect to the ellipse method above, but is easier to apply.
Show/Hide Code 08radial_gradient.py
from PIL import Image, ImageDraw
'''
create radial gradient using points of colour

radial gradient, plots colour from inside to outside
normally lighter colour on inside so becomes from_colour

odd number pixels gives to_colour 4 corners and from_colour centre pixel
even number not quite from_colour at central area
'''

def LerpColour(c1,c2,t):
    return (int(c1[0]+(c2[0]-c1[0])*t),int(c1[1]+(c2[1]-c1[1])*t),
            int(c1[2]+(c2[2]-c1[2])*t))

w=25 # best if odd
h=25 # best if odd
centreX = (w-1)/2
centreY = (h-1)/2
hypotSq = (w-1)*(w-1) + (h-1)*(h-1)

from_colour = (241,239,234)
to_colour = (172,161,150)

img = Image.new('RGB', (w,h), '#FFFFFF')
idraw = ImageDraw.Draw(img)

for y in range(h):
    rise = centreY - y
    rise *= rise

    for x in range(w):
        run = centreX - x
        run *= run

        distSq = run + rise
        dist = 4 * distSq / hypotSq

        idraw.point([x,y],fill=LerpColour(from_colour,to_colour,dist))

# img.show()
img.save('rad.png')